
On this page
The fastest way to connect from a Windows PC is the RDP file from your QuantVPS Control Panel. It opens Remote Desktop Connection, built into Windows, with your IP address and username filled in, so you only paste your password.
Video Guide
Prefer to watch? Our 2-minute video walks through downloading your RDP file and connecting from a Windows PC: watch "How to connect to your VPS". It plays the film for your device, so choose Windows PC in the player if you open it on another device. The RDP file steps start at 0:22.
Step 1: Download Your RDP File
Your RDP file comes from the Control Panel, in one click.
- Log in to your QuantVPS Control Panel and open your VPS.
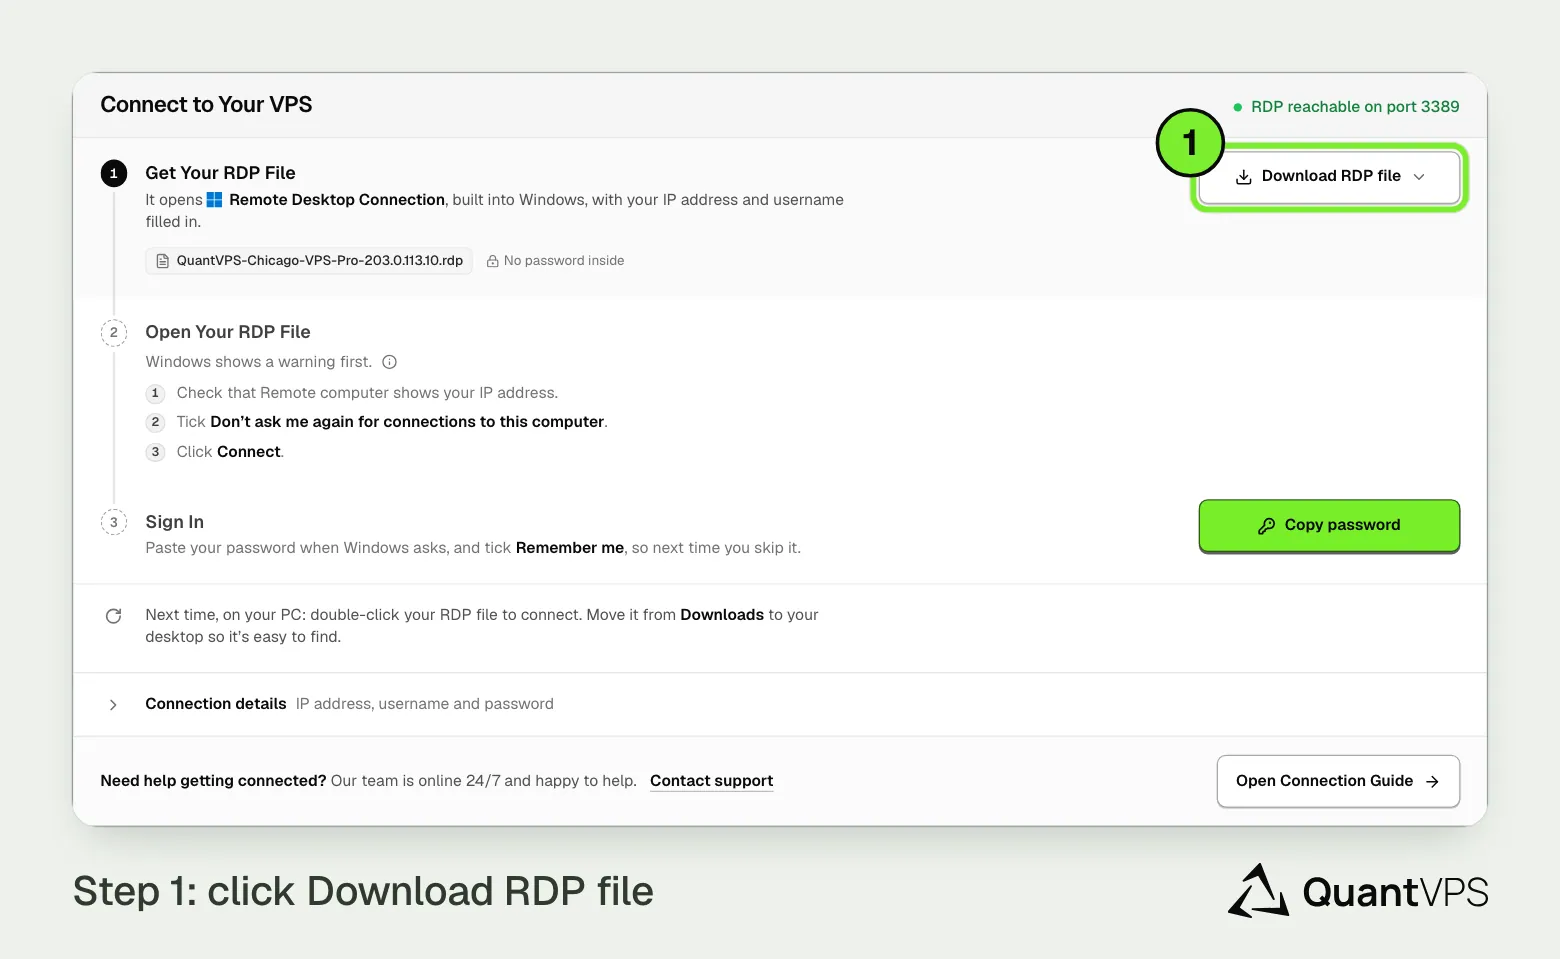
- Under Connect to Your VPS, click Download RDP file.
- Choose how your VPS should show: All my monitors (full screen on every monitor), One monitor (full screen on one monitor) or In a window (resize it next to your other apps). The file downloads at once.
- To move files between your PC and the VPS, tick Share my drives before you choose.
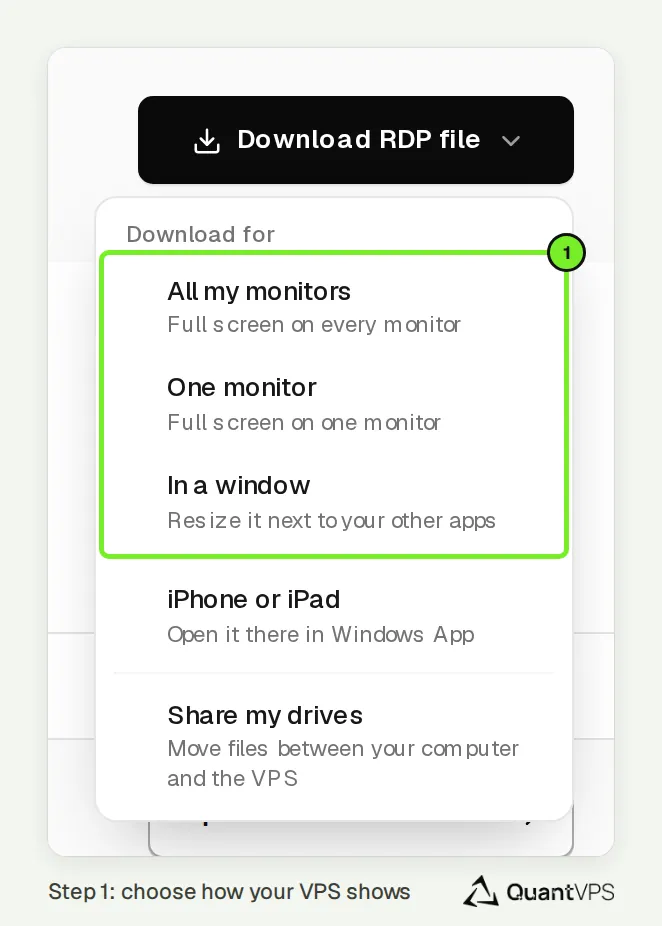
Note: Your browser remembers your choice for next time. The file never contains your password.
Step 2: Open the File
- Open the downloaded file from your Downloads folder. Its name looks like QuantVPS-Chicago-VPS-Pro-203.0.113.10.rdp, with your own location, plan and IP address.
- It opens Remote Desktop Connection with your IP address and username filled in.
Step 3: Check the Warning and Connect
Windows shows a warning first, because the file isn't signed.
- Check that Remote computer shows your VPS IP address.
- Tick Don't ask me again for connections to this computer, then click Connect.
- If your warning says Caution: Unknown remote connection, check that the address is your VPS IP address. Tick Clipboard so you can copy and paste between your PC and the VPS (and Drives if you shared them), then click Connect.
Step 4: Paste Your Password
- Back in your browser, click Copy password under Connect to Your VPS.
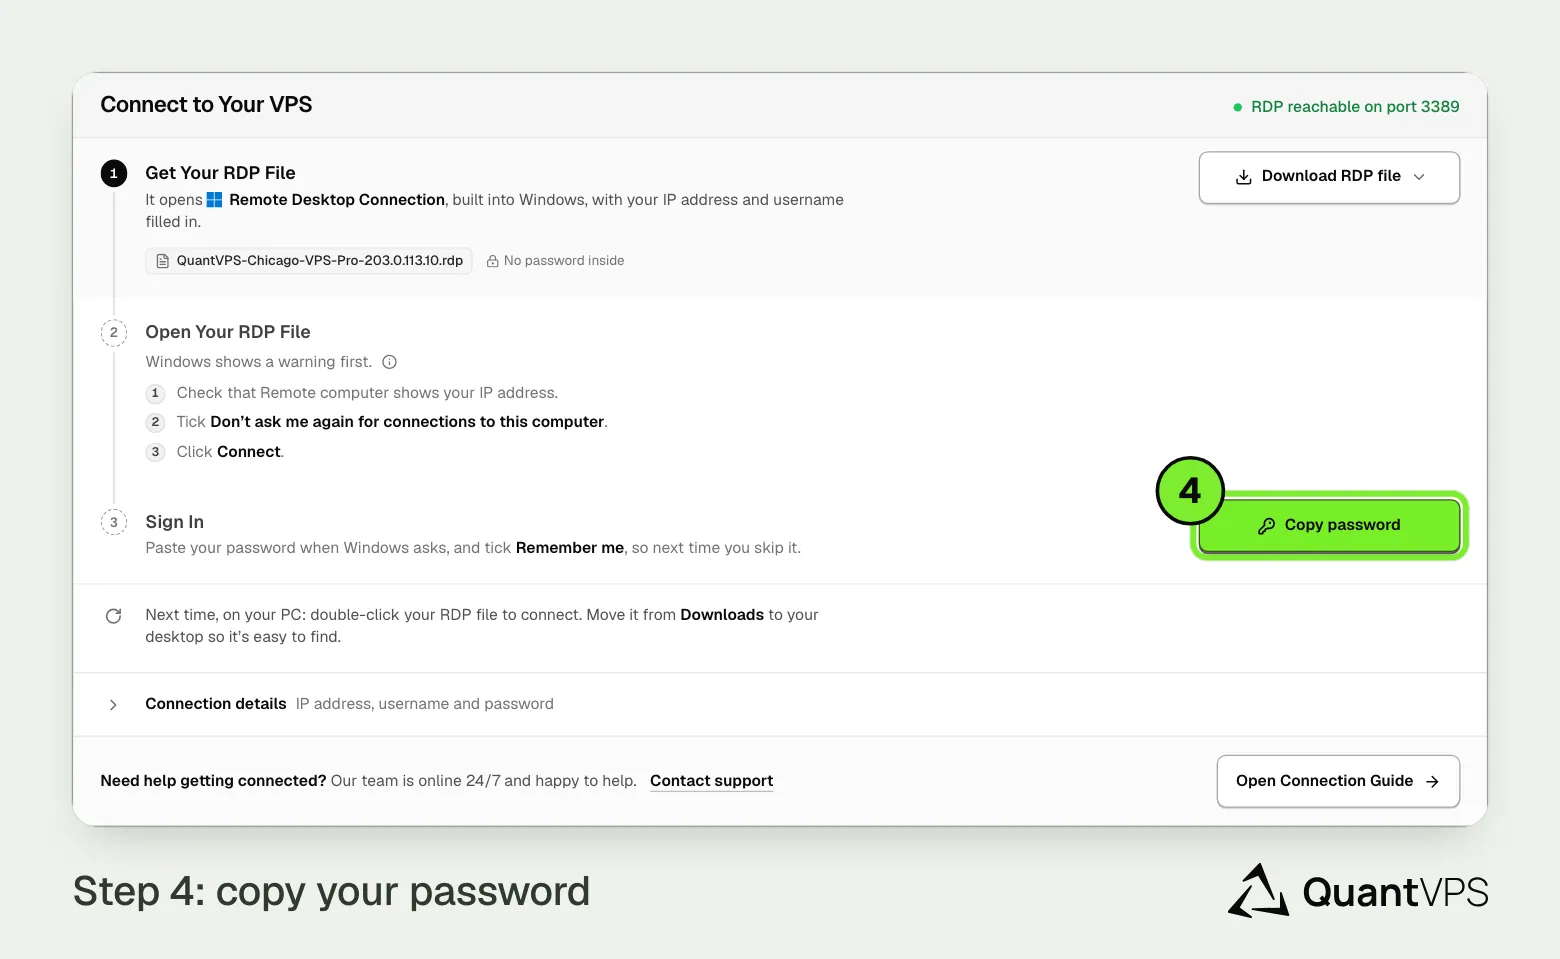
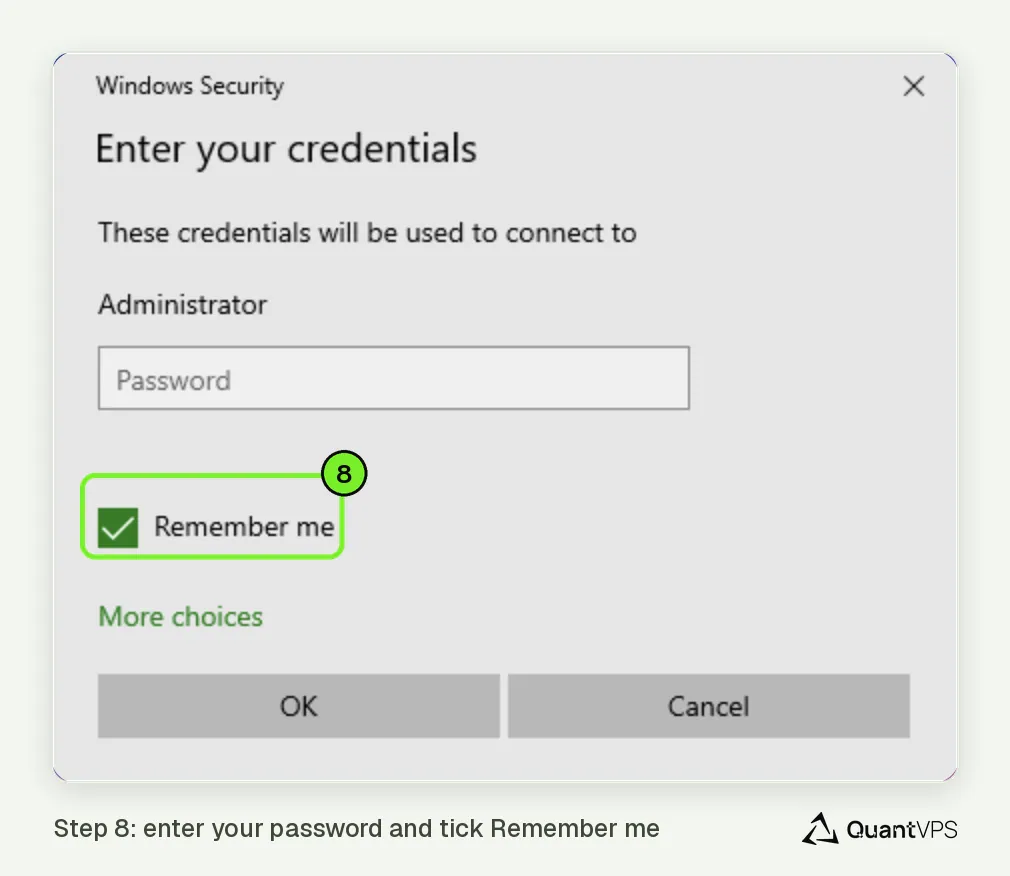
- In the Windows Security window, paste your password, tick Remember me and click OK. Next time, you skip this window.
Note: Changed your password, or had a reinstall, upgrade or move? Windows can still fill in the old password. Remove the saved login, then connect again: see how to remove saved RDP credentials.
Step 5: Accept the Certificate Prompt
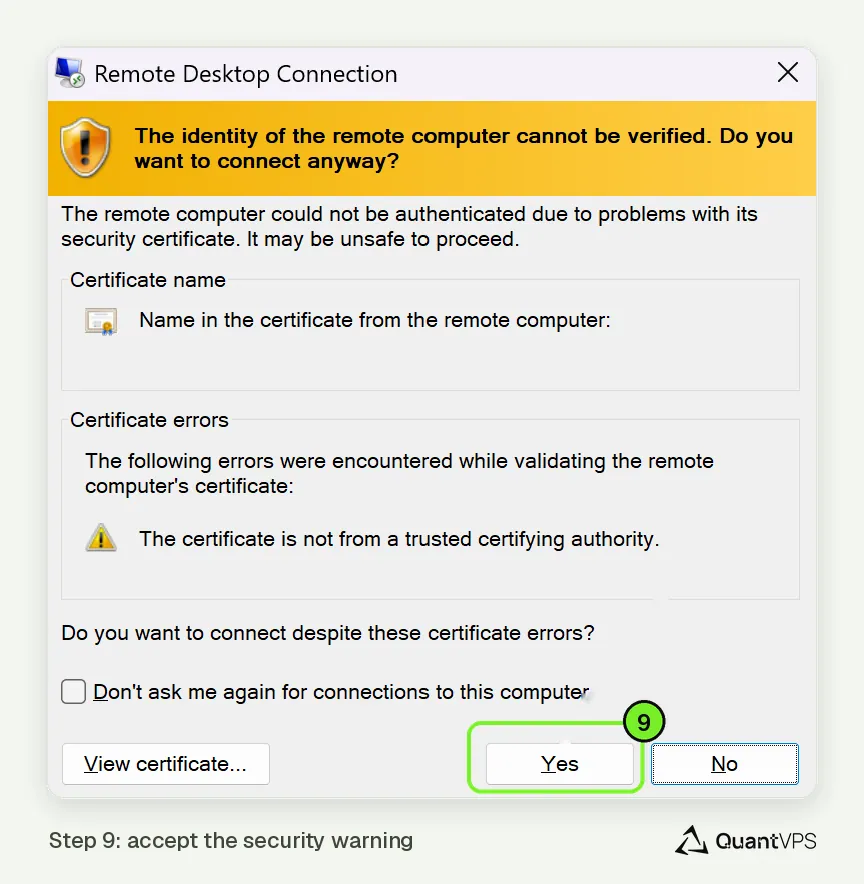
- The first time, Windows asks about your VPS certificate. Click Yes.
- You can tick "Don't ask me again for connections to this computer" to skip it next time.
Step 6: You're In
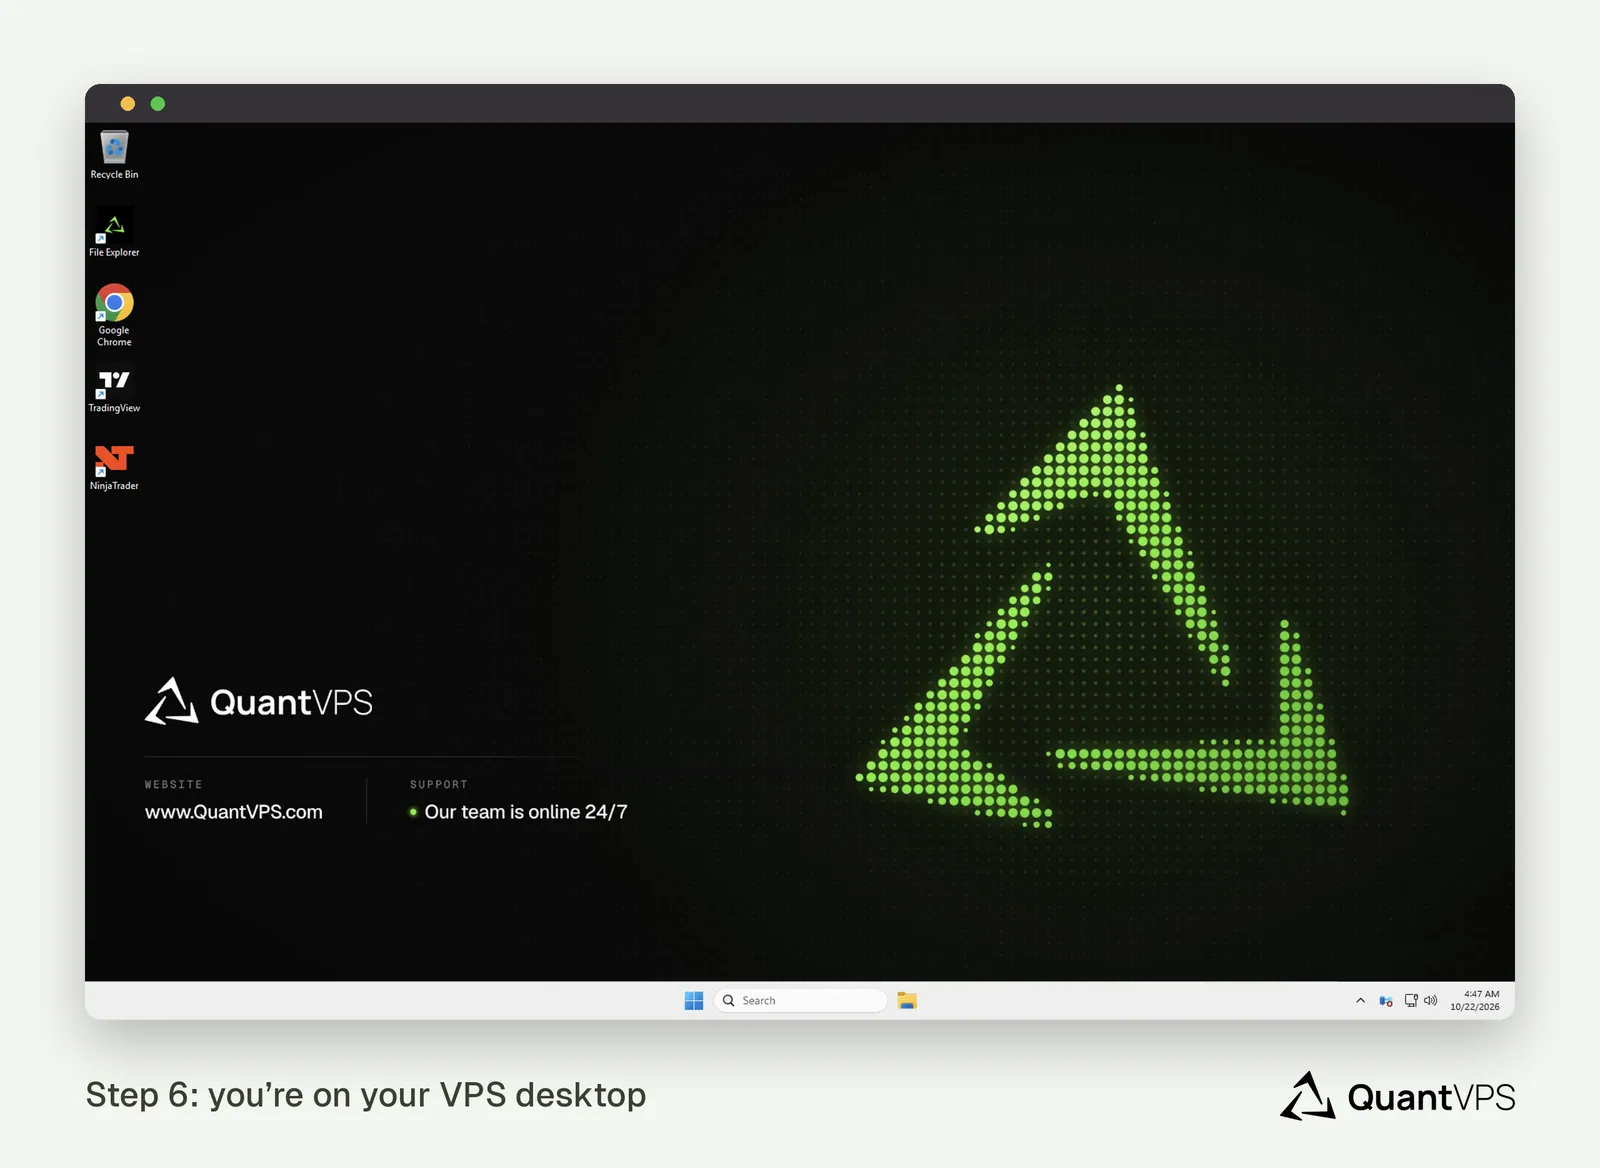
- You will now see your VPS desktop, just like a normal Windows computer.
- This environment runs 24/7, independent of your local machine.
Next, set up your trading platform:
- Your VPS comes with Chrome and TradingView installed, plus the platform you selected at checkout: open them from the desktop and log in.
- For other platforms, open Chrome on your VPS, then download and install your trading software (e.g., MetaTrader, Quantower).
- Log into your trading account and configure your settings.
Connect without the RDP file
Prefer to type your details in? These are the steps without the RDP file. When you're connected, continue with Step #6 above.
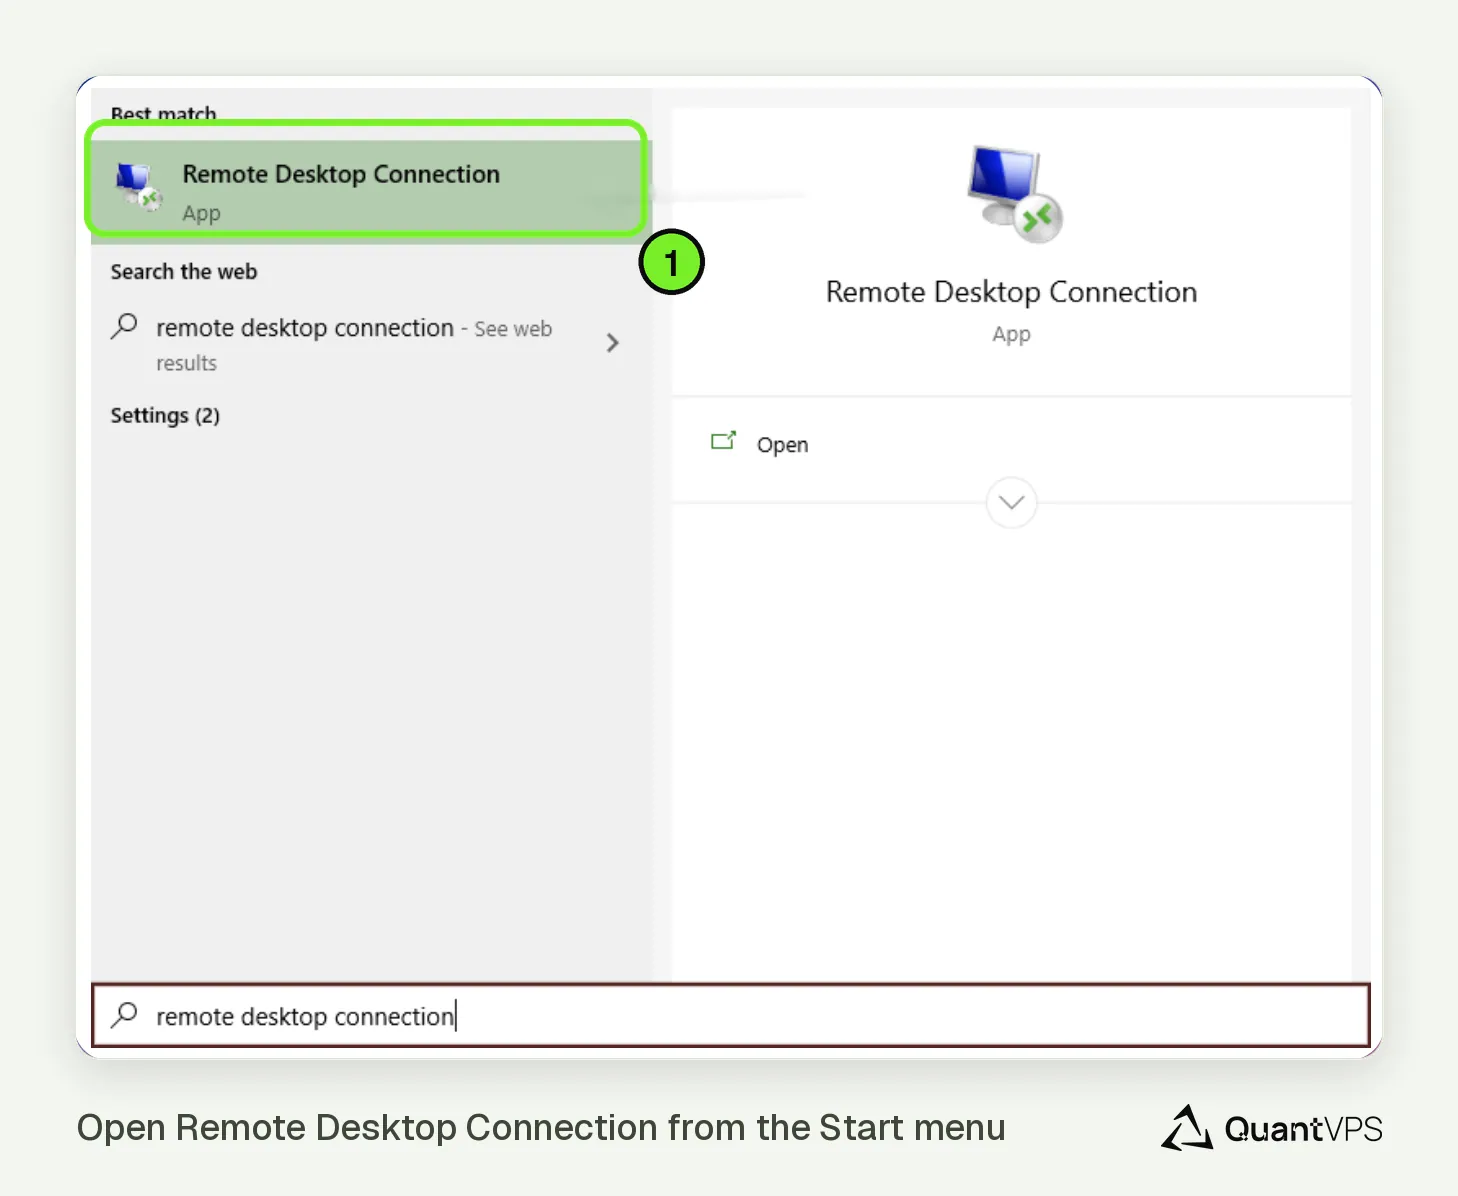
Step 1: Open Remote Desktop Connection
- Click the Start Menu on your desktop.
- Type "Remote Desktop Connection" or "RDC" in the search bar.
- Select Remote Desktop Connection from the results.
Shortcuts
- Windows 10: Press Windows + R, type mstsc, then press Enter.
- Windows 11: Right-click the Start Menu → select Run → type mstsc → press Enter.
Step 2: Enter Your VPS IP Address
- In the RDC window, locate the "Computer" field.
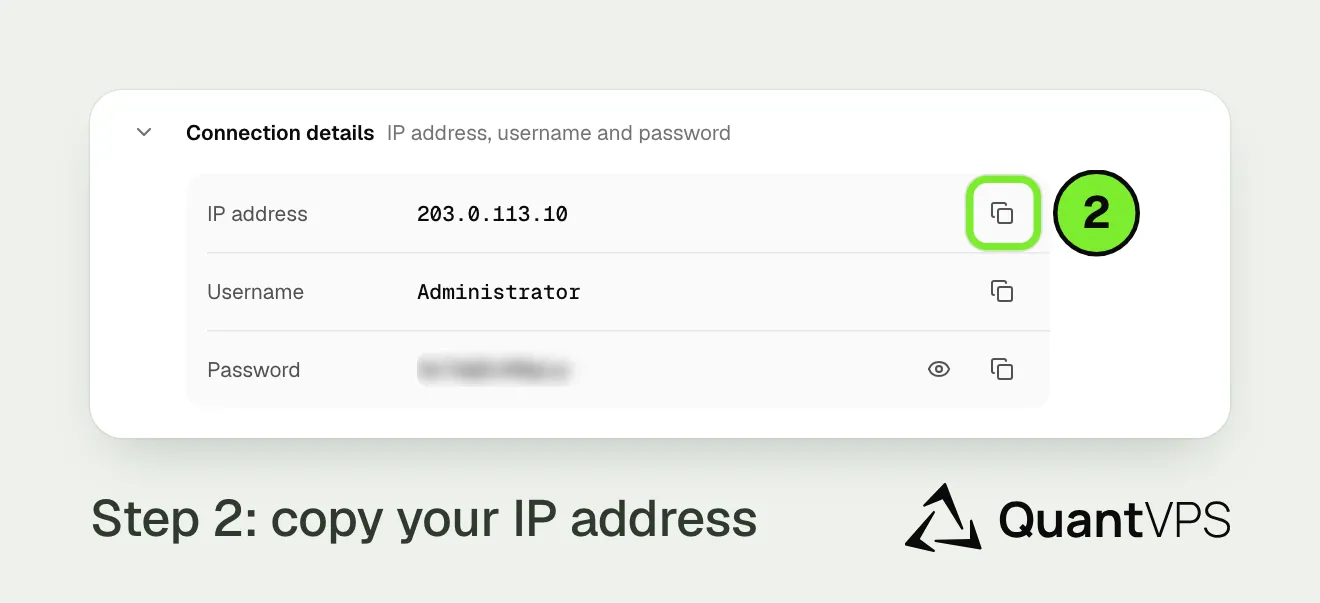
The IP address copy button in Connection details on the QuantVPS Control Panel Enter your QuantVPS IP address (found in your QuantVPS Control Panel).
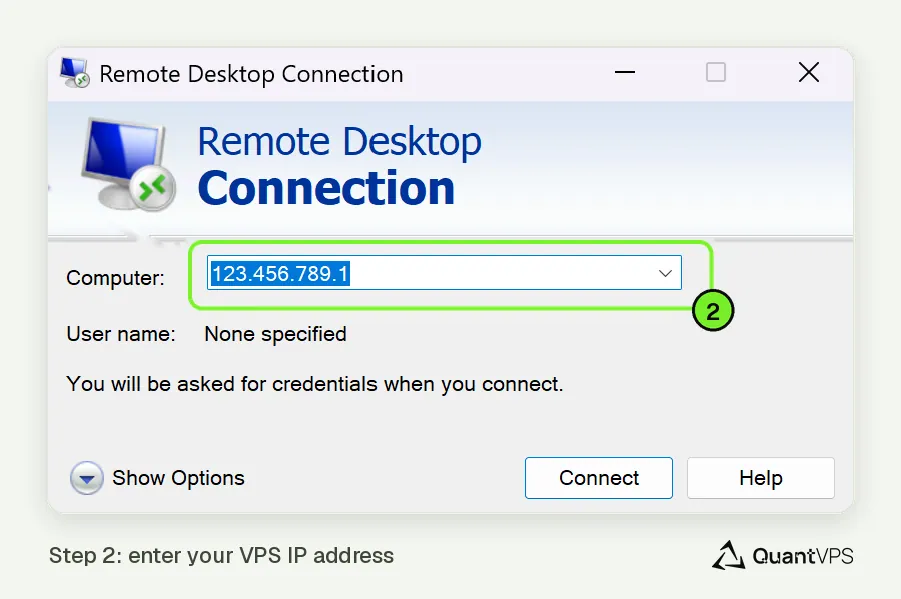
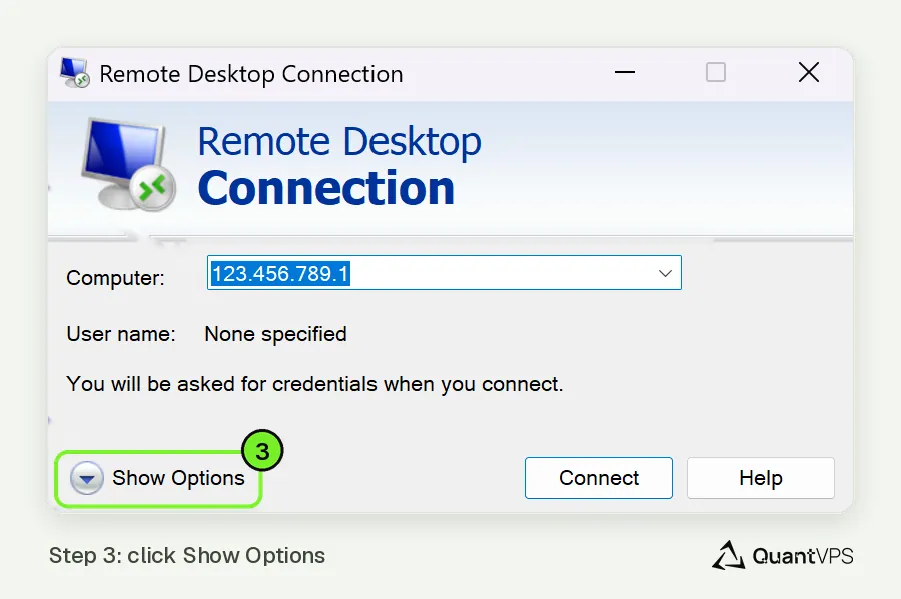
Note: The screenshot above and the one in Step 3 both show the same Remote Desktop Connection window; the "Show Options" panel is part of this same window, just expanded.
Step 3: Expand Options
- Click the "Show Options" button in the bottom-left corner to reveal more settings.
Step 4: Enter Your Username
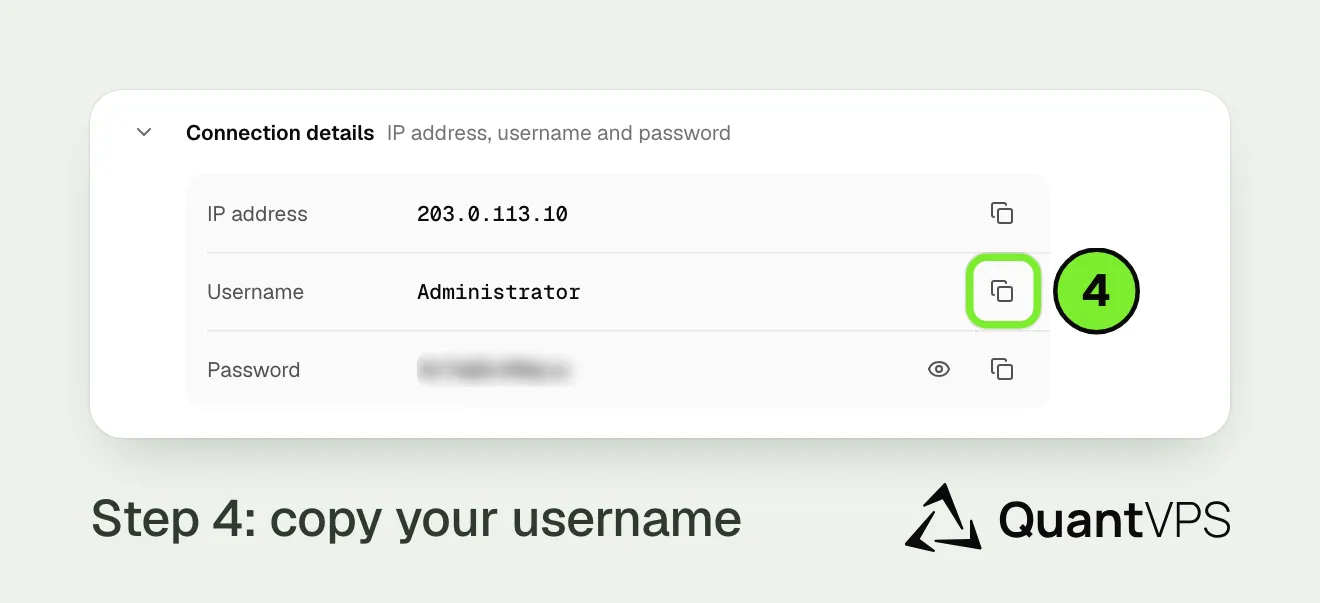
The username copy button in Connection details on the QuantVPS Control Panel In the "User name" field, enter the username provided in your Control Panel.
- Usually, this will be Administrator for Windows VPS plans.
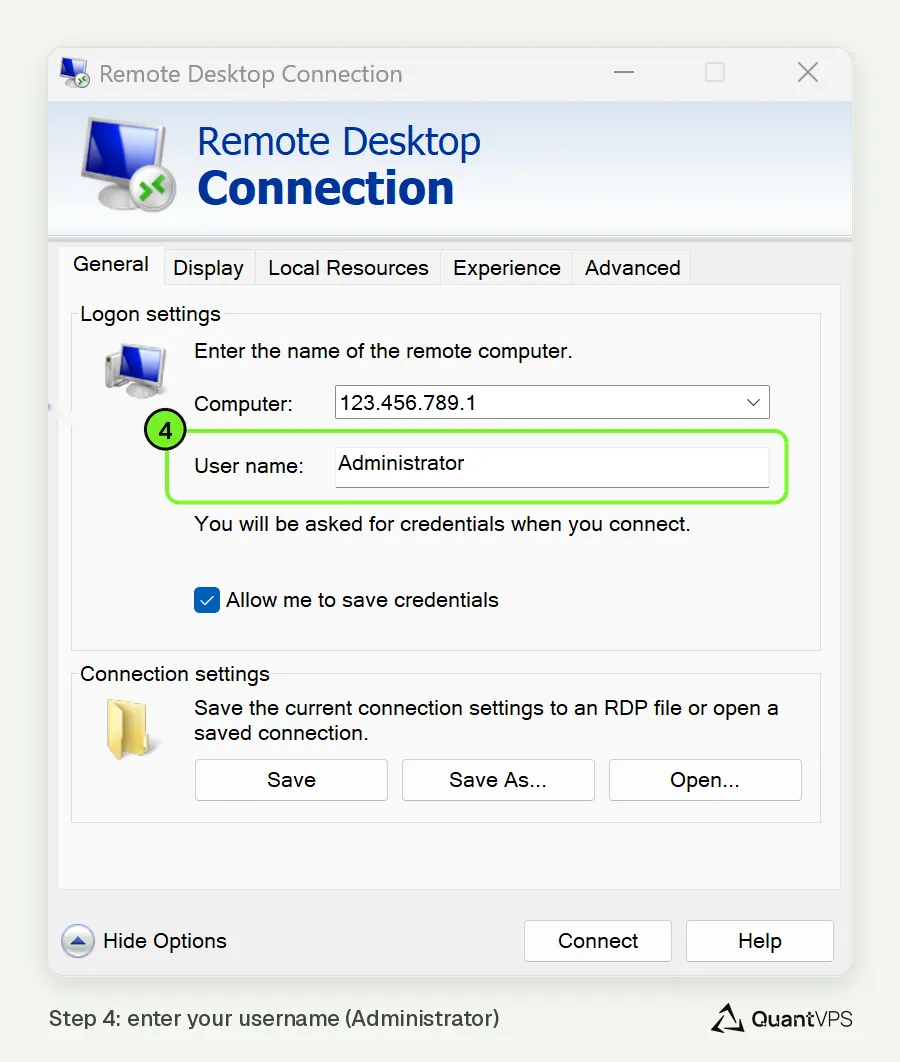
Note: The screenshot above and the one in Step 5 both show the same options panel; the "Allow me to save credentials" checkbox sits directly below the username field pictured here.
Step 5: Allow Saving Your Credentials
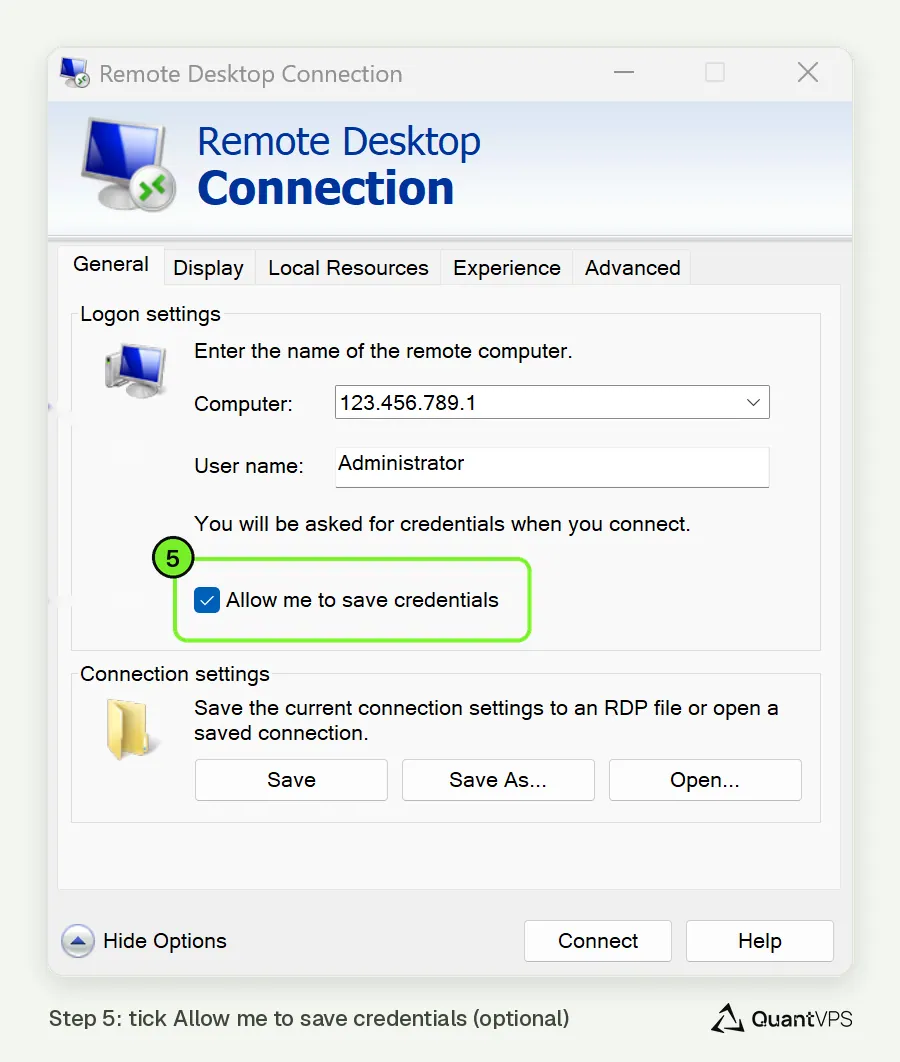
- Tick "Allow me to save credentials", so Windows can remember your password in Step 8.
- Changed your password later, or had a reinstall, upgrade or move? Remove the saved login first: see how to remove saved RDP credentials.
Step 6: Connect
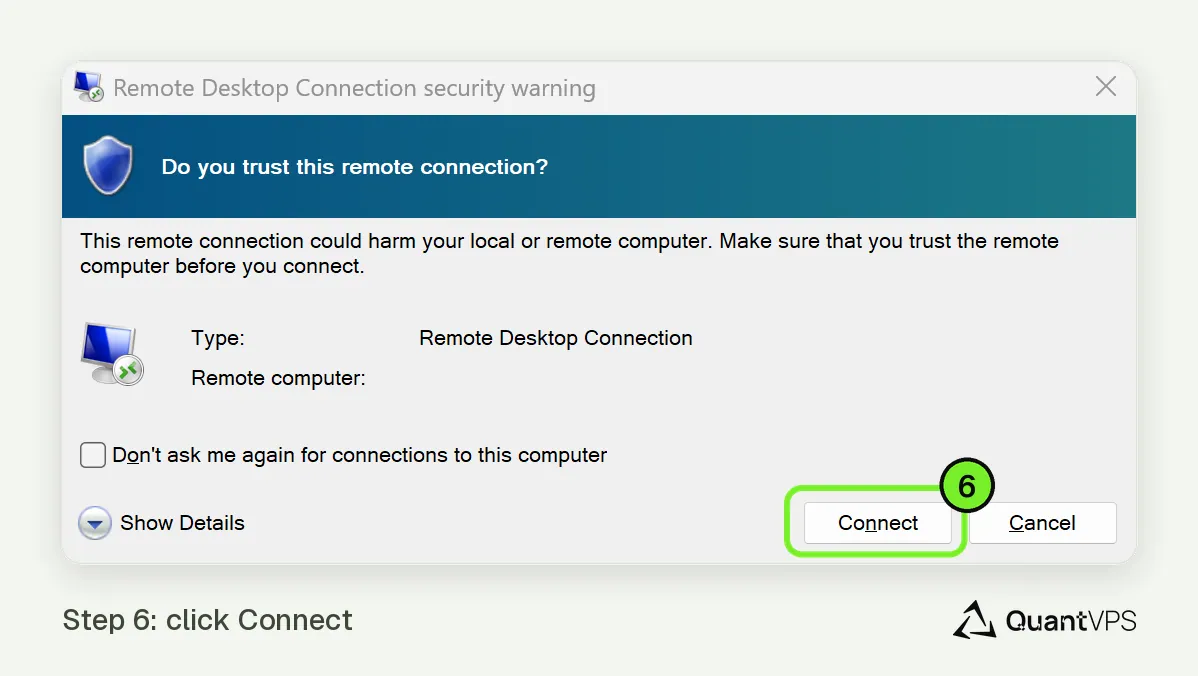
- Click the "Connect" button to begin establishing the session.
Step 7: Enter Your Password
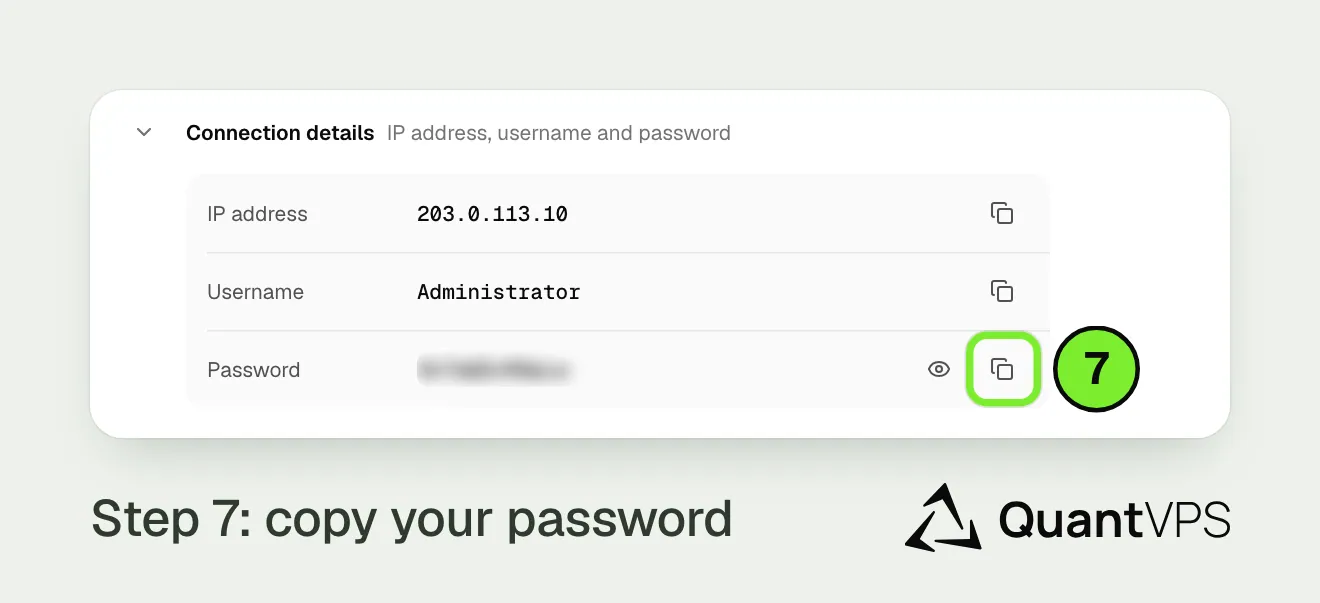
The password copy button in Connection details on the QuantVPS Control Panel When prompted, enter your VPS password, which can also be found in your Control Panel.
Step 8: Tick Remember Me
- Tick "Remember me" and click OK. Next time, you skip this window.
Step 9: Accept Security Warning
- If a security prompt appears, click "Yes" to proceed.
- You can optionally check "Don't ask me again for connections to this computer" to skip future warnings.
Additional Tips
- Double-check your IP address, username, and password if you encounter connection issues. If the RDP file doesn't open, use the steps under Connect without the RDP file.
- Only one connection can use the same Windows account at a time. Signing in with that account from a second device, from inside the VPS, or from the browser console disconnects the first one with "another connection was made".
- Make sure Remote Desktop is enabled on your VPS (this is on by default with QuantVPS).
- To disconnect, close the Remote Desktop window instead of signing out, so your platforms keep running. If you need to restart the VPS, use Restart, not Shut down.
This setup allows you to trade securely and reliably from anywhere using your QuantVPS.
Need Assistance?
Our support team is available 24/7. If you have any questions or run into issues, open a support ticket from your QuantVPS dashboard and we'll get back to you as quickly as possible.