
Want to automate your trades on Kalshi? Building a trading bot can help you monitor markets 24/7, eliminate emotional decisions, and execute strategies consistently. This guide explains how to set up, code, and deploy your Kalshi trading bot using Python and a virtual private server (VPS). Here's a quick overview of what you'll learn:
- Account Setup: Verify your Kalshi account, generate API keys, and fund it securely.
- Bot Development: Use Python to connect to Kalshi's API, write trading logic, and test it in a demo environment.
- Deployment: Host your bot on QuantVPS for uninterrupted operation.
- Optimization: Test, monitor, and refine your bot for better performance.
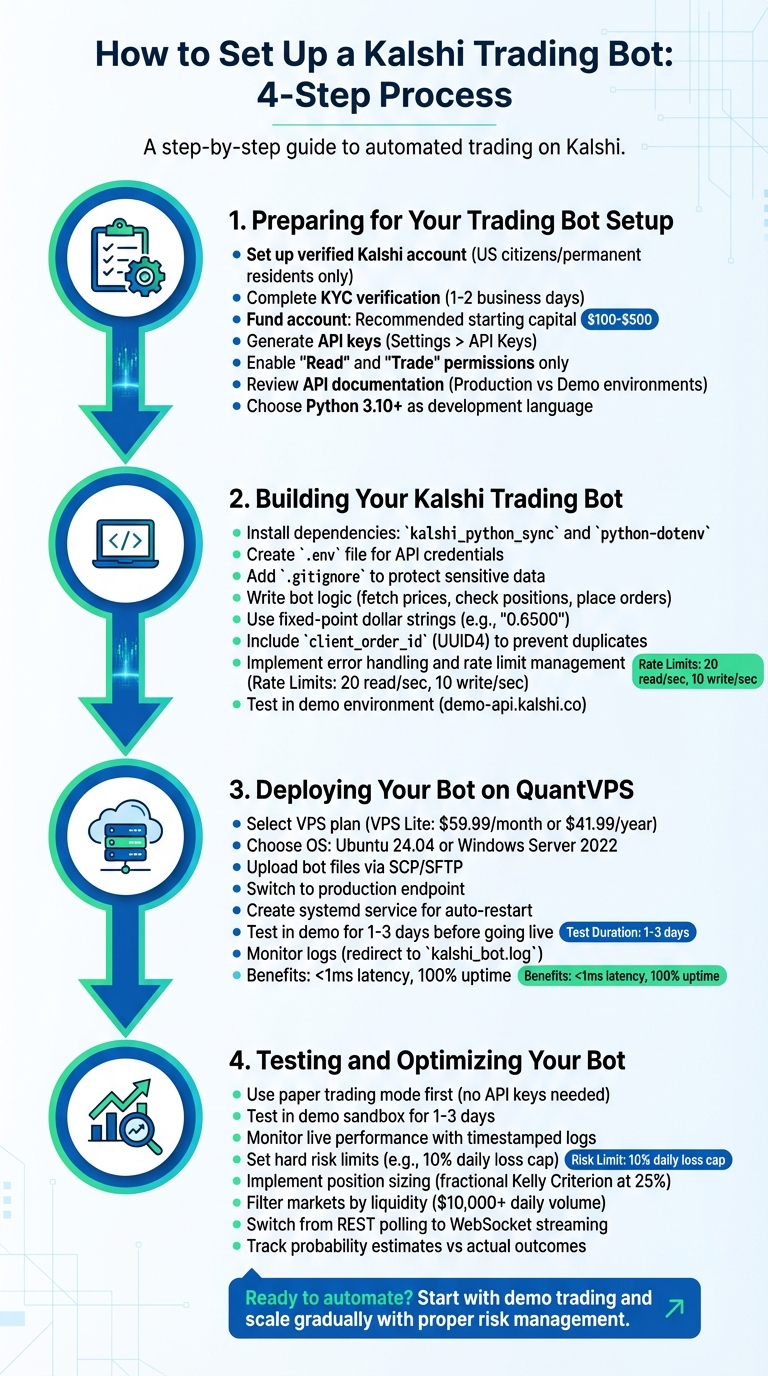
4-Step Process to Set Up a Kalshi Trading Bot
Step 1: Preparing for Your Trading Bot Setup
Before diving into coding, you need to set a solid foundation. This means verifying your Kalshi account, getting familiar with the API documentation, and choosing the right tools for the job. Taking these preparatory steps will help avoid errors and make your bot’s deployment smoother. Let’s break it all down.
Setting Up a Kalshi Account
Your trading bot starts with a verified and secure Kalshi account. This step is essential because it gives you access to the API credentials needed to connect your bot. Keep in mind that only US citizens or permanent residents with a valid Social Security Number can complete the required Identity Verification (KYC) process. To get started, sign up at kalshi.com using your legal name exactly as it appears on your government-issued ID - any discrepancies will slow things down.
The KYC process requires a few key details: your full legal name, date of birth, SSN, and a photo of a government-issued ID (like a driver’s license, passport, or state ID). In most cases, verification takes 1–2 business days, though automated checks might clear you in just minutes. After approval, you can fund your account via ACH bank transfer (free, but may take 1–3 business days) or debit card (instant, though fees apply). While you technically only need $0.01 to place a trade, starting with $100–$500 gives your bot enough capital to implement meaningful strategies.
Once your account is funded, head to Settings > API Keys to generate your RSA key pair. This process will provide you with a Key ID (public identifier) and a Private Key in RSA_PRIVATE_KEY format. Be sure to enable "Read" and "Trade" permissions for your bot while keeping "Withdraw" disabled to enhance security. As AgentBets.ai wisely advises:
"A bot never needs to withdraw funds. Scope your API key to read and trade only".
Make sure to save your private key immediately - it won’t be accessible again after closing the generation page.
Understanding Kalshi's API Documentation
Kalshi’s API operates in two environments: Production for live trading (https://api.elections.kalshi.com/trade-api/v2) and Demo for paper trading (https://demo-api.kalshi.co/trade-api/v2). Always start with the demo environment to test your bot’s logic using simulated funds before putting real money on the line.
Python users benefit from an official SDK that simplifies RSA-PSS authentication. Since March 2026, Kalshi has been using fixed-point dollar strings for prices (e.g., "0.6500") and count_fp strings for quantities (e.g., "10.00"), moving away from the older integer cent formats.
Understanding the market structure is also key. Events are broad questions, while Markets are specific contracts within those events. For example, tickers like KXBTCD-26MAR31-T55000 follow a structured format. Keep in mind that API queries provide live data for about 3 months, while older data requires specialized historical endpoints. Basic accounts have rate limits of approximately 20 read requests per second and 10 write requests per second.
Choosing the Right Tools and Language
For beginners, Python is the go-to language for building a Kalshi trading bot. It’s user-friendly, has strong documentation, and offers an official SDK that simplifies setup. Use Python 3.10 or later with the kalshi_python_sync library. This version is easier to debug than the asynchronous one and automatically handles RSA-PSS authentication.
If you’re coding without an SDK, you’ll need libraries like requests, cryptography, and python-dotenv. Store your API Key ID and Private Key in a .env file and make sure to include it in your .gitignore file to avoid accidental exposure. When placing orders, always use the client_order_id field (a UUID4 string) to prevent duplicate trades caused by network interruptions.
Advanced users might prefer asynchronous programming with kalshi_python_async, which is better suited for handling multiple markets or high-frequency data. TypeScript developers can use the kalshi-typescript SDK, though Python offers more resources tailored to trading. For those with deep technical expertise, the FIX 4.4 protocol provides the lowest latency option for institutional-level trading.
Step 2: Building Your Kalshi Trading Bot
Now that you've laid the foundation, it's time to dive into the coding process. This step involves setting up the software, connecting to Kalshi's API, and creating the logic that will drive your bot's trading decisions. Let’s break it down.
Run 24/7 while you sleep. Keep bots, platforms, and trade copiers online on a dedicated VPS.
Low-latency VPS hosting for your trading platform.
From $59.99/mo
Installing Dependencies and Setting Up Your Development Environment
With your Kalshi account ready and API access established, the next step is preparing your coding environment. Begin by installing Python 3.10 or later on your system. Once that's done, open your command line and install the official Kalshi library by entering:
pip install kalshi_python_sync
This library simplifies RSA-PSS authentication. You'll also need python-dotenv to securely manage your API credentials. Install it with:
pip install python-dotenv
Now, create a new project folder. Inside it, add a .env file to store your Key ID and Private Key securely. Open the .env file in a text editor and input:
KALSHI_API_KEY_ID=your_key_id_here
KALSHI_PY_PRIVATE_KEY_PEM=your_private_key_here
Replace the placeholders with your actual credentials. To avoid accidentally exposing sensitive details, create a .gitignore file in the same folder and include the following lines:
.env
*.pem
This ensures your credentials stay private, even if your code is shared publicly.
To confirm everything is set up correctly, write a simple Python script to load your credentials and fetch market data from Kalshi's demo environment (demo-api.kalshi.co). If the script runs successfully and retrieves market information, you're ready to move on to building the bot's logic.
Writing Basic Bot Logic
With the setup complete, you can now focus on coding the bot's core functionality. A trading bot typically operates in a loop: it fetches market prices, checks your current positions, evaluates conditions, and places or cancels orders as needed. For instance, your bot could monitor a market and place a buy order if the price drops below $0.50.
Since Kalshi doesn't support market orders, you’ll need to simulate them by using limit orders at favorable prices (e.g., $0.99 for a buy or $0.01 for a sell). Format prices as dollar strings with up to four decimal places (e.g., "0.6500") and use count_fp strings for contract quantities (e.g., "10.00"). Always include a client_order_id field in UUID4 format to avoid duplicate trades if a request fails and retries.
To handle errors, implement exponential backoff. If you exceed Kalshi's rate limits (20 read requests per second and 10 write requests per second for basic accounts), you'll receive a 429 error. In such cases, pause for a few seconds before retrying. For faster updates, use the WebSocket API (wss://api.elections.kalshi.com/trade-api/ws/v2) instead of polling REST endpoints. This reduces latency and helps you stay within rate limits.
Once your trading logic is complete, take steps to secure your API credentials.
Securing API Keys and Sensitive Information
Protecting your API credentials is critical since they control access to your trading account. Avoid hardcoding your Key ID or Private Key directly in your Python scripts. As PredScope advises:
"Never hardcode your API key ID in source code - use environment variables".
Use python-dotenv to load credentials from your .env file. For added security, store your .pem private key file in a directory outside your project folder to ensure it doesn’t get included with your code. Also, double-check that .env and *.pem are listed in your .gitignore file.
To further minimize risks, periodically rotate your API keys through the Kalshi "Account Settings" page. When generating keys, enable only the "Read" and "Trade" permissions. Avoid enabling "Withdraw", as your bot should not have the ability to move funds out of your account.
Before deploying your bot in live markets, thoroughly test it in Kalshi's demo environment. This allows you to debug and refine your logic using simulated funds, ensuring your bot performs as intended without risking real money.
Step 3: Deploying Your Bot on QuantVPS
Now that your bot is tested and ready, it’s time to deploy it to a reliable hosting environment. Running your bot from home might seem convenient, but it comes with risks like power outages, internet disruptions, or unexpected system restarts. A dedicated VPS offers a stable, uninterrupted environment for your trading bot. Here’s why QuantVPS is a great choice.
Why Use QuantVPS for Hosting?
When trading on Kalshi, latency matters. A home internet connection might produce latency of 100 ms or more to Kalshi's API servers, but a specialized VPS can reduce this to as low as 1 ms. That kind of speed can make a real difference in trading performance. QuantVPS also guarantees 100% uptime, thanks to its enterprise-grade hardware. Plus, you’ll have full administrative access, letting you customize the environment to match your preferred programming language or framework.
Setting Up Your QuantVPS Environment
Once you’ve chosen QuantVPS, it’s time to set up your environment. Start by selecting a plan that fits your trading needs. For a single Kalshi trading bot, the VPS Lite plan - priced at $59.99/month (or $41.99/month when billed annually) - is a solid choice for beginners. If you’re working with more complex algorithms or managing multiple trading accounts, consider upgrading to the VPS Pro or VPS Ultra plans for more CPU power, memory, and storage.
When configuring your VPS, Ubuntu 24.04 is a great option for a lightweight Linux environment, especially if your bot is written in Python. Prefer a graphical interface? You can opt for Windows Server 2022 instead. Once your VPS is ready, connect via SSH and install Python 3.10+ along with necessary dependencies like kalshi_python_sync and python-dotenv.
Next, upload your bot and .env files to the VPS. Use secure methods like SCP or SFTP to transfer sensitive files, such as your .pem key. Update your bot’s configuration to switch from the demo URL to the production endpoint.
To keep your bot running without interruptions, create a systemd service file on Linux:
sudo nano /etc/systemd/system/kalshi-bot.service
Inside the file, define the service settings like this:
ExecStart=/usr/bin/python3 /path/to/kalshi_bot.py
Restart=always
RestartSec=10
Enable and start the service with these commands:
systemctl enable kalshi-bot.service
systemctl start kalshi-bot.service
This setup ensures your bot automatically restarts if the script crashes or the server reboots.
Before switching to live trading, test your bot in Kalshi’s demo environment for 1–3 days. This allows you to check network stability and confirm that everything is functioning correctly. Monitor your logs (e.g., by redirecting output to a file like kalshi_bot.log) to track performance and troubleshoot any issues. Once you’re confident everything is running smoothly, transition to the production API and let your bot start trading.
Stay online and closer to execution. Choose a VPS location for CME futures, New York markets, London FX, API trading, and more.
Host your platform near the market route that matters.
From $59.99/mo
Step 4: Testing and Optimizing Your Bot
Once deployment is done, the next step is all about testing and refining your bot. This phase is crucial because even a minor error in coding can lead to significant losses. Here's how you can ensure your bot runs smoothly and efficiently.
Testing in a Simulated Environment
Begin by using paper trading mode to test your bot's logic without any financial risk. This mode allows your bot to operate with real-time market data from Kalshi's public API but doesn't place real trades or require API keys. Simulated trades are logged into a CSV file, capturing timestamps, tickers, prices, and profit/loss calculations.
Once the local logic is verified, move to Kalshi's demo sandbox environment (demo-api.kalshi.co). This environment replicates the production API but uses fake funds. You'll need demo-specific API keys to test critical functions like connectivity, authentication, and order execution without risking actual money.
"Always build and test in demo first. Switch to production only after your bot behaves correctly." - AgentBets.ai
Run your bot in the demo environment for at least 1–3 days. This testing period ensures your bot can handle challenges like session token expiration (tokens expire every 30 minutes) and market closures. Use tools like spreadsheets or scripts to analyze the CSV logs, review trade history, and fine-tune parameters before going live.
Once you're confident in the bot's stability through simulations, you can start monitoring its real-world performance.
Monitoring Live Performance and Logs
After successful demo testing, transition to production. Initially, set DRY_RUN=true to confirm the bot's ability to access production data and authenticate properly. When you decide to trade with real money, monitoring becomes essential.
Redirect your bot's output to timestamped log files using the tee command. This creates a permanent record for troubleshooting and auditing. Use Python's logging module to categorize messages (INFO, WARNING, ERROR) with timestamps for easier analysis. Additionally, ensure your systemd service (configured in Step 3) is set up to restart the bot automatically in case of crashes.
Your bot should be equipped to handle common errors:
| Error Message / Issue | Likely Cause | Recommended Action |
|---|---|---|
Could not fetch balance: 401 |
Expired or invalid API token | Trigger re-authentication logic |
BTC price error |
External API timeout | Retry fetching data on the next poll |
No open market found |
Invalid ticker or inactive market | Check KALSHI_EVENT_TICKER_PREFIX |
429 Too Many Requests |
Rate limit exceeded | Implement exponential backoff and queue requests |
For advanced tracking, log every trade and decision into a local SQLite database. You can also set up a real-time dashboard with tools like Streamlit or Grafana to visualize metrics such as profit/loss, win rates, and drawdowns. Regularly comparing your bot's logs with your Kalshi account balance will help you spot and resolve discrepancies quickly.
With monitoring in place, you can shift your focus to refining your trading strategy.
Optimizing Trading Strategies
Set hard risk limits to safeguard your funds. For example, establish a daily loss cap, such as a 10% drawdown, to stop trading after reaching a certain loss threshold. Some developers also implement a "max drawdown circuit breaker" that halts all trading if the portfolio loses 15% of its value.
Position sizing is another critical factor. The Kelly Criterion can help determine the optimal bet size based on your edge (the difference between your probability estimate and the market price). Many developers use "fractional Kelly" (typically 25% of the full Kelly) to reduce volatility and account for estimation errors.
Keep a record of your bot's probability estimates versus actual outcomes to ensure proper calibration. For instance, if your bot predicts a 70% chance but the event occurs only 50% of the time, it indicates overconfidence and requires adjustment. A notable example from early 2026 involved the "Protogen Max" bot, which suffered a 0-32 record due to an uncalibrated model. The developer later adopted a "Base-Rate Divergence" strategy, fractional Kelly sizing, and a 20% bankroll exposure limit to improve performance.
Liquidity filtering is essential to avoid slippage. Your bot should steer clear of markets with thin order books by checking for a minimum daily volume (e.g., $10,000) and verifying order book depth before placing orders. Factor in Kalshi's trading fees, which range from $0.01 to $0.07 per contract, to ensure your strategy remains profitable.
For better efficiency, switch from REST polling to WebSockets to reduce latency. Additionally, cache market metadata and use batch endpoints to place multiple orders while staying within rate limits. These incremental improvements can make a big difference over thousands of trades.
Conclusion
Recap of Steps
You've successfully built and deployed your Kalshi trading bot! Here's a quick look at what you accomplished:
You started by setting up your Kalshi account, completing verification, funding your account, and generating limited-permission RSA key pairs for secure API authentication. Then, you developed your bot using Python 3.10 or later and Kalshi's official SDKs. If you prefer a more structured framework, you can also build and automate strategies with Backtrader. You implemented RSA-PSS signing for authentication and adhered to Kalshi's fixed-point pricing format, which uses dollar strings like "0.6500".
To ensure your bot worked as intended, you tested it in Kalshi's demo sandbox environment (demo-api.kalshi.co), verifying your strategy. Once satisfied, you deployed your bot on QuantVPS for 24/7 operation, configured systemd for automatic restarts, and set up detailed logging to track live performance.
During testing, you applied hard risk limits, filtered markets by liquidity to minimize slippage, and implemented error handling with exponential backoff. With these steps complete, your bot is ready to take on live trading.
Next Steps and Advanced Features
Now that your bot is up and running, you can explore advanced techniques to enhance its performance. For starters, switch from REST polling to WebSocket streaming. This will allow you to receive real-time updates on order book changes and trade executions with lower latency. If you're aiming for institutional-grade speed, consider using the FIX 4.4 protocol, which offers even faster performance for high-frequency trading strategies.
To refine your bot's strategy, consider integrating machine learning. Use Kalshi's historical data endpoints to analyze trends and backtest your models beyond the standard three-month window. Plus, Kalshi's 0% trading fee structure makes it a great platform for high-volume automated strategies.
When you're ready to start live trading, begin with a small number of contracts - 5 to 10 is a good range - to closely monitor performance. Keep a testing environment running in the demo sandbox to validate any updates before rolling them out to production. With careful risk management, continuous monitoring, and consistent improvements, your bot has the potential to grow into a highly effective trading system.
FAQs
How do I keep my Kalshi API private key safe on a VPS?
To keep your Kalshi API private key safe on a VPS, make sure it's stored securely and isn't directly embedded in your code. A good approach is to use environment variables or a secure file with restricted permissions to load the key when needed.
Additionally, strengthen your VPS's security by implementing measures like encrypted storage, strict access controls, and routine security audits. These steps can help safeguard your credentials from unauthorized access.
What’s the easiest way to avoid duplicate orders if my bot retries?
To steer clear of duplicate orders during retries, implement idempotency keys by assigning a unique client order ID (ClOrderID) to every order. This ID should be distinct for each request - commonly achieved by generating a UUID.
Include this unique ID in your order payload. The Kalshi API identifies these IDs and ensures that duplicate executions are avoided, even if your bot sends multiple requests. This approach safeguards data integrity and keeps your order processing reliable.
How can I stop my bot quickly after hitting a daily loss limit?
To ensure your Kalshi trading bot stops after hitting a daily loss limit, integrate a monitoring mechanism into its logic to track cumulative losses. Define a specific loss threshold in advance. Once this threshold is breached, activate a function that halts trading activities. This might involve stopping the placement of new orders or pausing all operations by toggling a flag or executing a shutdown command. Automating this process provides a dependable way to manage and control losses effectively.


