
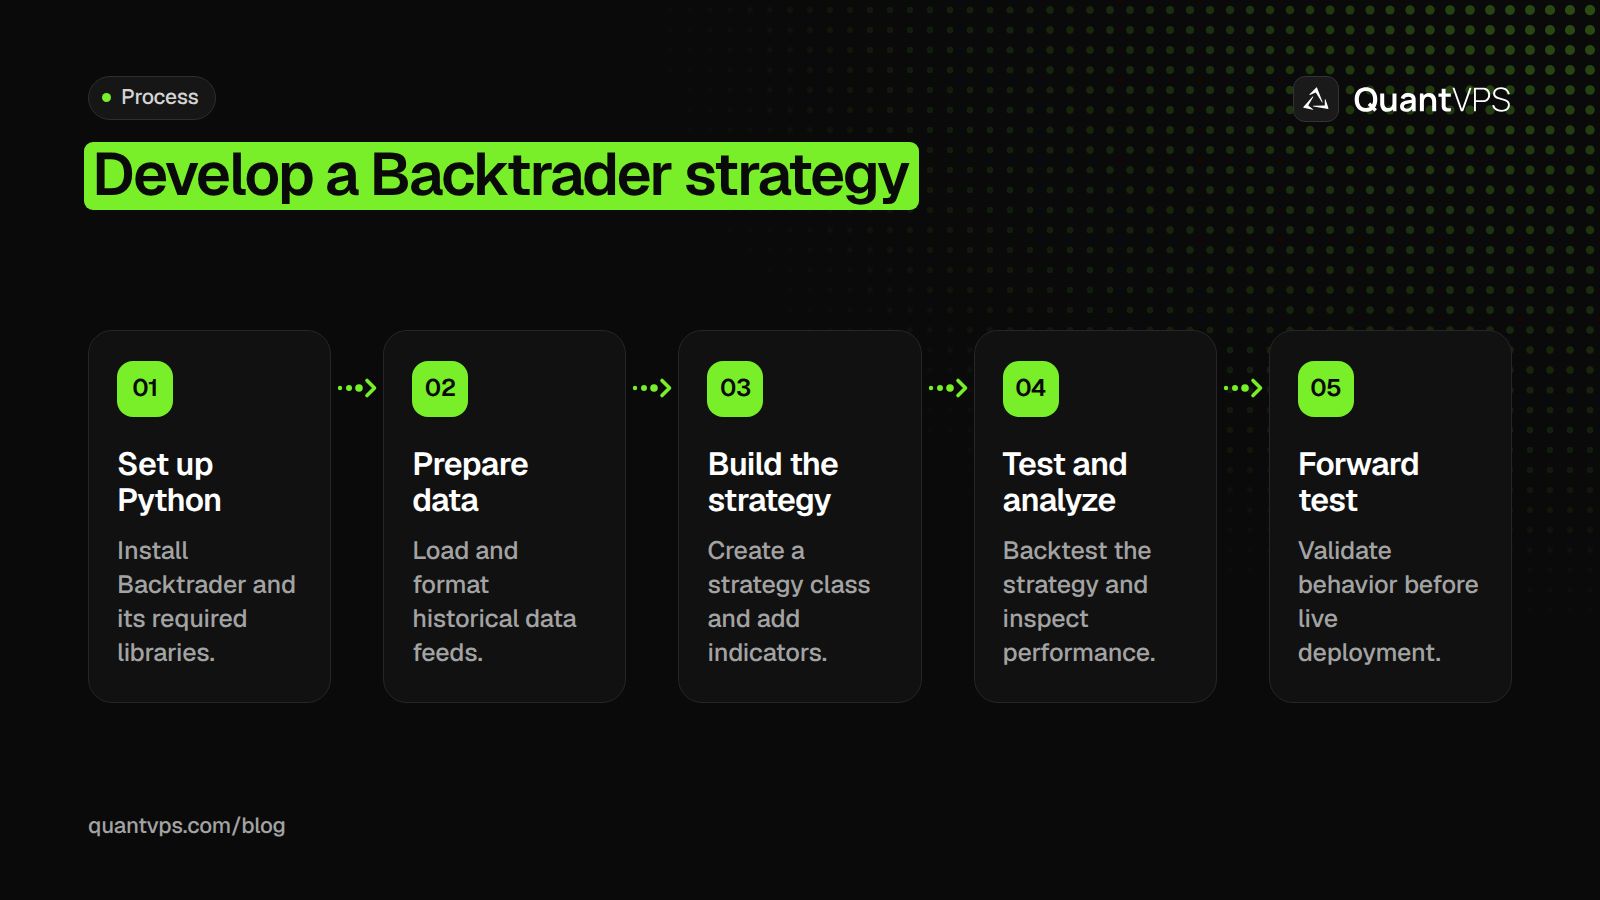
Backtrader is a Python framework that simplifies building and testing trading strategies. Instead of coding everything from scratch, it handles quantitative trading strategies and backtesting, broker simulation, and indicators, letting you focus on strategy development. This guide covers:
- Setting up Backtrader and required libraries
- Preparing and loading historical data
- Building custom strategies with indicators
- Backtesting and analyzing performance before forward testing your algorithm
- Automating live trading with broker integrations
Installing Backtrader and Setting Up Your Environment
Get started by setting up your environment and installing Backtrader along with its essential libraries.
Backtrader operates as a standalone tool for backtesting trading strategies, meaning it doesn’t rely on external dependencies for its core functions. However, adding extra libraries can enable features like charting and advanced data handling.
Installing Backtrader and Required Libraries
The easiest way to install Backtrader is through PyPI. Open your terminal or command prompt and enter:
pip install backtrader[plotting]
This command installs Backtrader along with matplotlib (version 1.4.1 or later) and its related packages, letting you create visual charts. If you only need the core backtesting engine without plotting, use:
pip install backtrader
For working with historical price data, you’ll need pandas and numpy. Install them with:
pip install pandas numpy
If you plan to fetch historical data from Yahoo Finance, include yfinance:
pip install yfinance
For live trading (ideally from an always-on algo trading VPS rather than your laptop), you’ll need broker-specific libraries. For example, if you’re using Interactive Brokers, install IbPy from GitHub:
pip install git+https://github.com/blampe/IbPy.git
Beyond these libraries, you might also consider other algorithmic trading tools to streamline your workflow. Other helpful libraries include:
- pytz for timezone management
- oandapy for Oanda integration
- TA-Lib for additional technical indicators
Additionally, pin matplotlib to version 3.2.2 to avoid compatibility issues with cerebro.plot():
pip install matplotlib==3.2.2
Setting Up a Python Development Environment
Using a virtual environment is a smart way to isolate your trading project dependencies and avoid conflicts with other Python tools. To create one, navigate to your project folder and run:
python -m venv trading_env
Activate the virtual environment with:
-
On Windows:
trading_env\Scripts\activate -
On macOS/Linux:
source trading_env/bin/activate
For better organization, create a dedicated folder for your data feeds, such as../datas/. This structure simplifies file management, and you can use Python’s os.path module to set relative paths, reducing the chances of file location errors.
Backtrader also includes a handy tool called btrun (or bt-run-py), which simplifies tasks like loading data feeds and running strategies. This tool is especially useful for Windows users, as it allows you to execute strategies directly from the command line using the module:strategy:kwargs format.
Once your environment is ready, you can move on to loading and preparing historical data.
Uptime
99.999% uptime. Built for 24/7 trading reliability.
Your VPS runs in Tier IV datacenters with redundant power and network, monitored 24/7 on site.
See the uptime SLA







From $29.99/mo · Windows or Linux
Loading and Preparing Historical Data
Backtrader uses a "Lines" system, meaning each data feed typically includes DateTime along with OHLCV (Open, High, Low, Close, Volume) series, and optionally OpenInterest. You can integrate these data feeds into your backtesting engine by adding them to a Cerebro instance using the cerebro.adddata(data) method.
The platform offers built-in CSV parsers that work with Yahoo Finance (both online and offline files), VisualChart, and Backtrader's specific CSV format. If your data is already in memory as a Pandas DataFrame, the PandasData feed allows you to pass it directly into Backtrader, skipping the need to save it as a file.
Using Built-in Data Feeds in Backtrader
Loading historical stock data from Yahoo Finance is straightforward. Here's an example:
import backtrader as bt
import datetime

cerebro = bt.Cerebro()

data = bt.feeds.YahooFinanceData(
    dataname='AAPL',
    fromdate=datetime.datetime(2023, 1, 1),
    todate=datetime.datetime(2024, 12, 31)
)

cerebro.adddata(data)
The fromdate and todate parameters take Python datetime objects to define the historical range for backtesting. For local CSV files, you can use GenericCSVData to map the columns to OHLCV fields:
data = bt.feeds.GenericCSVData(
    dataname='../datas/eurusd_1h.csv',
    dtformat='%Y-%m-%d %H:%M:%S',
    datetime=0,
    open=1,
    high=2,
    low=3,
    close=4,
    volume=5,
    openinterest=-1
)

cerebro.adddata(data)
Setting openinterest=-1 indicates that this field is missing in your dataset. For Pandas users, you can load your DataFrame and pass it directly:
import pandas as pd

df = pd.read_csv('../datas/forex_data.csv', parse_dates=['Date'])
df.set_index('Date', inplace=True)

data = bt.feeds.PandasData(dataname=df)
cerebro.adddata(data)
If the DataFrame index isn't a datetime object, specify the appropriate column using the datetime parameter.
Formatting Data for Futures and Forex Markets
Handling futures and forex data often requires additional adjustments. For futures contracts, which expire on different dates, you can create a continuous data stream by combining multiple contracts using bt.feeds.RollOver. This method switches between contracts based on conditions like volume or open interest.
For custom CSV formats, GenericCSVData allows you to map columns according to your data's structure. For instance, if the columns are arranged in HLOC order instead of OHLC, you can adjust the indices like this:
data = bt.feeds.GenericCSVData(
    dataname='../datas/custom_format.csv',
    high=1,
    low=2,
    open=3,
    close=4,
    volume=5,
    openinterest=-1
)
You can also define trading hours using sessionstart and sessionend. The timeframe parameter lets you choose resolutions such as ticks, seconds, minutes, days, weeks, months, or years.
Before loading data, ensure that each bar meets these conditions: low ≤ min(open, close), high ≥ max(open, close), and volume ≥ 0. Additionally, convert all timestamps to UTC to avoid errors caused by Daylight Savings Time.
"Bad data silently kills strategies. Before you backtest or push anything to production, normalize schemas, fix timezones, de-duplicate, validate OHLCV, handle missing data deliberately, detect and cap outliers." - Pham The Anh
You can use pandas.read_csv to clean your data - sorting, removing duplicates, and converting timezones - before passing the DataFrame into Backtrader via bt.feeds.PandasData. Clean, validated data is the foundation for effective strategy development. By setting preload=True in your Cerebro instance, you can load the entire data feed into memory, speeding up the backtesting process.
Once your historical data is loaded and properly validated, you're ready to examine building and testing your trading strategies.
Building Custom Trading Strategies
Once your historical data is loaded and verified, you’re ready to create a trading strategy. In Backtrader, this involves subclassing bt.Strategy. Every custom strategy must inherit from this base class and implement two essential methods: __init__ for setup and next() for execution logic. Use __init__ to initialize indicators and variables, while next() handles the decision-making process based on your strategy's rules.
Creating a Strategy Class in Backtrader
Here’s a simple example of a strategy structure:
import backtrader as bt

class MyStrategy(bt.Strategy):
    params = (
        ('sma_period', 20),
        ('rsi_period', 14),
    )

    def __init__(self):
        self.dataclose = self.datas[0].close
        self.order = None
        self.sma = bt.indicators.SimpleMovingAverage(
            self.datas[0], period=self.params.sma_period
        )

    def notify_order(self, order):
        if order.status in [order.Completed]:
            if order.isbuy():
                self.log(f'BUY EXECUTED, Price: {order.executed.price:.2f}')
            elif order.issell():
                self.log(f'SELL EXECUTED, Price: {order.executed.price:.2f}')
        self.order = None

    def next(self):
        if self.order:
            return

        if not self.position:
            if self.dataclose[0] > self.sma[0]:
                self.order = self.buy()
        else:
            if self.dataclose[0] < self.sma[0]:
                self.order = self.sell()
The params section defines adjustable parameters, like the moving average period, so you can fine-tune your strategy without altering the code. Indicators, like the simple moving average (SMA), are initialized in __init__ and stored as attributes for easy reference.
The notify_order() method tracks order updates. It ensures that orders are confirmed as completed before new ones are placed. Resetting self.order to None after completion prevents overlapping trades.
The next() method is where the strategy logic comes into play. It checks for pending orders and determines whether to enter or exit a position based on the defined rules. Backtrader’s [0] index refers to the current bar, while [-1] accesses the previous one.
Adding Indicators and Entry/Exit Logic
For better performance, instantiate technical indicators in __init__. If no data feed is specified, indicators default to the first feed (self.data0). Below is an example strategy using multiple indicators:
class MovingAverageCrossover(bt.Strategy):
    params = (
        ('fast_period', 10),
        ('slow_period', 30),
    )

    def __init__(self):
        self.dataclose = self.datas[0].close
        self.order = None

        self.fast_ma = bt.indicators.SMA(
            self.datas[0], period=self.params.fast_period
        )
        self.slow_ma = bt.indicators.SMA(
            self.datas[0], period=self.params.slow_period
        )

        self.crossover = bt.indicators.CrossOver(
            self.fast_ma, self.slow_ma
        )

    def next(self):
        if self.order:
            return

        if not self.position:
            if self.crossover > 0:
                self.order = self.buy()
        else:
            if self.crossover < 0:
                self.order = self.sell()
The CrossOver indicator simplifies logic by returning 1 when the fast moving average crosses above the slow one and -1 when it crosses below. Calculating these signals in __init__ speeds up execution during backtesting.
For more advanced strategies, you can combine multiple conditions using Backtrader's built-in logical operators:
def __init__(self):
    self.sma = bt.indicators.SMA(period=20)
    self.rsi = bt.indicators.RSI(period=14)

    self.buy_signal = bt.And(
        self.dataclose > self.sma,
        self.rsi < 30
    )
This approach precalculates signals, making the next() method cleaner and more efficient.
Testing the Strategy with Sample Data
To test your strategy, create a Cerebro instance, add your data feed and strategy, and then run the backtest:
import backtrader as bt
import datetime

cerebro = bt.Cerebro()

data = bt.feeds.YahooFinanceData(
    dataname='AAPL',
    fromdate=datetime.datetime(2023, 1, 1),
    todate=datetime.datetime(2024, 12, 31)
)

cerebro.adddata(data)
cerebro.addstrategy(MovingAverageCrossover)

cerebro.broker.setcash(10000.0)
cerebro.broker.setcommission(commission=0.001)

print(f'Starting Portfolio Value: ${cerebro.broker.getvalue():.2f}')
cerebro.run()
print(f'Final Portfolio Value: ${cerebro.broker.getvalue():.2f}')

cerebro.plot()
The line cerebro.broker.setcommission(commission=0.001) adds a 0.1% trading cost per transaction, ensuring your results are more realistic. The initial portfolio value is set to $10,000.
To track the strategy's actions, include a logging function in your class:
def log(self, txt, dt=None):
    dt = dt or self.datas[0].datetime.date(0)
    print(f'{dt.isoformat()} {txt}')
This function prints timestamps and custom messages during each cycle, helping you debug and monitor your trades. After running the backtest with cerebro.run(), the cerebro.plot() command generates a visual representation of price movements and trade signals, giving you a clear view of how the strategy performed.
DDoS protection
DDoS protection included. On every plan.
Always-on mitigation filters attack traffic at the network edge. Every plan includes a dedicated IP and unmetered bandwidth for the trading environment.
See every security layerFrom $29.99/mo · Windows or Linux
Backtesting and Analyzing Strategy Performance
Once you've crafted your custom strategy, the next step is to rigorously test and evaluate its performance using Backtrader's Cerebro engine. Here's how to set it up and analyze the results.
Setting Up the Cerebro Engine
The Cerebro engine acts as the core of Backtrader, managing data feeds, strategies, and broker settings to simulate your backtest. To get started:
-
Create a Cerebro instance and add your data feed using
cerebro.adddata(data). If your strategy requires multiple data feeds, you can add them here. The first feed (data0) will serve as the reference for synchronization. -
Add your strategy using
cerebro.addstrategy(StrategyClass). -
Configure your broker settings. For example, set the starting cash with
cerebro.broker.setcash(10000.0)(default is 10,000 units) and define trading costs usingcerebro.broker.setcommission(commission=0.001)for a 0.1% commission per trade.
Before running the backtest, include performance analyzers to collect key metrics. For instance:
-
Use
cerebro.addanalyzer(bt.analyzers.SharpeRatio, _name='mysharpe')to track risk-adjusted returns. -
Add
cerebro.addanalyzer(bt.analyzers.DrawDown, _name='drawdown')to monitor portfolio drawdowns.
Once everything is configured, you're ready to run the backtest and generate performance data.
Executing a Backtest
Run your backtest using cerebro.run(). This command returns a list of strategy instances, allowing you to access analyzer results. For example:
results = cerebro.run()
After execution, retrieve key metrics from the analyzers. For instance:
-
Get the Sharpe Ratio with
results[0].analyzers.mysharpe.get_analysis(). -
Use
analyzer.pprint()for a clean, formatted view of the results.
Additionally, you can visualize the backtest by calling cerebro.plot(). This will generate a chart showing price movements, entry/exit points, and the equity curve.
Analyzing Backtest Results
Once the backtest is complete, it's time to examine the metrics and evaluate the strategy's performance.
- Sharpe Ratio: This metric reflects risk-adjusted returns. A higher Sharpe Ratio indicates better performance relative to the risk taken.
- Drawdown: This tracks the largest decline in portfolio value from a peak, giving insight into the potential losses during a losing streak.
-
Trade Statistics: The
TradeAnalyzerprovides a breakdown of trade outcomes, including win/loss ratios, average profit, and streaks. This helps determine if your strategy is consistently profitable or overly dependent on a handful of trades. - Final Portfolio Value: This includes the value of open positions based on the last closing price, though keep in mind that actual execution prices might vary if positions are closed on the next bar.
It's also essential to compare gross profit to net profit to understand how trading costs impact your overall returns.
Key Metrics:
| Metric | Backtrader Object | Purpose |
|---|---|---|
| Sharpe Ratio | bt.analyzers.SharpeRatio |
Evaluates risk-adjusted returns relative to a rate |
| Drawdown | bt.analyzers.DrawDown |
Measures the maximum decline in portfolio value from a peak |
| Trade Statistics | bt.analyzers.TradeAnalyzer |
Provides a detailed breakdown of trade outcomes, including win/loss data |
| Annual Return | bt.analyzers.AnnualReturn |
Calculates the yearly percentage return of the strategy |
How Do You Know If a Backtrader Backtest Is Reliable?
The Mechanism Behind Overfitting
Repeatedly adjusting moving averages, stops and position sizing until historical results look clean tailors the strategy to that dataset. The strategy memorizes rather than generalizes.
What Look-Ahead Bias Actually Looks Like
Using a daily close to generate a signal and fill at that same close introduces information unavailable when the trade occurred. Future corporate actions can also distort adjusted history. Backtrader processes bars in order but cannot catch logical errors in your price references.
Survivorship Bias and Execution Reality
Testing only today’s S&P 500 companies excludes bankrupt, delisted and acquired firms. Real broker fees, slippage and realistic fill assumptions matter. Configure Backtrader’s commission and slippage models instead of trusting optimistic defaults.
Why Data Volume and Regime Coverage Change Everything
Too few trades produce unreliable results. Include trending, mean-reverting, high-volatility and low-volatility markets. A momentum strategy tested only in the 2013 to 2021 bull market can behave differently in 2000 to 2002 or 2008 to 2009.
In-Sample Development vs. Out-of-Sample Validation
Develop on one data portion, freeze parameters, then test unseen data. Repeat across rolling windows with walk-forward testing. Shift assumptions to test sensitivity: moving a parameter from 20 to 21 bars should not destroy a robust strategy.
Optimizing Strategy Parameters for Better Results
Fine-tuning parameters is crucial for turning a backtested strategy into a dependable trading system. Backtrader’s optimization engine simplifies this process by automating the evaluation of various parameter combinations.
Using cerebro.optstrategy for Parameter Optimization
To enable optimization, replace cerebro.addstrategy() with cerebro.optstrategy(StrategyClass, param=iterable). Instead of using fixed values, pass iterables like ranges or lists. For example, to test moving average periods between 10 and 30, you can use maperiod=range(10, 31). If a parameter requires a single value, pass it as a one-element tuple, such as param=(10,).
For faster optimization, take advantage of parallel processing by adjusting the maxcpus parameter in cerebro.run(). Setting maxcpus=None (the default) utilizes all available CPU cores, while specifying a number limits the CPU usage. Additionally, enabling optdatas=True and optreturn=True with maxcpus=None can improve execution speed by roughly 32%.
To keep the process efficient, disable trade logging (e.g., set printlog=False) to avoid cluttering the console. You can also use a stop() method to summarize and display key results.
Next, you’ll learn how to apply these optimizations with cerebro.optstrategy.
Selecting the Best Parameter Configurations
Once the optimization runs are complete, analyze the results returned by cerebro.run(). The output is a list of lists, where each sublist corresponds to the results of a specific optimization pass. When optreturn is enabled, these results are streamlined objects containing only strategy parameters and analyzer outputs, not the full strategy data.
Focus on achieving consistent performance rather than chasing isolated high returns. For example, if changing a parameter from 15 to 16 causes a significant drop in performance, the strategy might be overfitting to historical data. To objectively evaluate different parameter sets, use analyzers like bt.analyzers.SharpeRatio to measure risk-adjusted returns. Look for parameter ranges that provide stable performance across the entire test period.
| Feature | Setting | Impact |
|---|---|---|
| Parallel Processing | maxcpus=None |
Distributes runs across all CPU cores, reducing total run time. |
| Data Preloading | optdatas=True |
Preloads data in the main process, saving about 20% execution time. |
| Result Reduction | optreturn=True |
Returns only metadata and analyzer outputs, improving speed by 13–15%. |
Order flow
Built for scalpers. Heatmaps on dedicated resources.
Order-flow heatmaps and DOM ladders run on dedicated CPU, memory and NVMe, so your charts keep responding during volatility.
Explore the hardwareFrom $29.99/mo · Windows or Linux
Managing Position Size and Risk
Implementing Position Sizing
Backtrader’s default SizerFix trades one unit per order. To allocate 10% of available cash per trade, use cerebro.addsizer():
cerebro.addsizer(bt.sizers.PercentSizer, percents=10)
With $10,000 cash, 10% uses $1,000; at $15,000 it uses $1,500. The 2% risk rule gives 200 shares for $10,000 capital, a $10 entry and a $9 stop, risking $200. Position Size = (Total Capital × Risk %) / (Entry Price - Stop Loss Price). Integrate the calculation in next() using self.broker.get_cash() and the stop distance.
Risk Management Best Practices
Include transaction costs with cerebro.broker.setcommission() and configure slippage. Attach stops and targets with buy_bracket or sell_bracket. Use order_target_percent() to limit exposure to an asset. Add the DrawDown observer to visualize peak-to-trough declines and assess whether you can handle the strategy’s rough periods.
Conclusion and Next Steps
Key Takeaways
You've now walked through the entire process of building algorithmic trading systems using Backtrader. The framework is designed to simplify the development process, allowing you to focus on crafting reusable trading logic without being bogged down by infrastructure complexities. At the heart of it all is the Cerebro engine, which acts as a central hub to manage data feeds, strategies, observers, and analyzers for both backtesting and live trading. Backtrader's coding style aligns naturally with Python, making it intuitive to access and manipulate data points.
Your strategies rely on a consistent structure: the __init__ method to set up indicators and the next method to evaluate logic with each new bar. The engine simulates realistic trading conditions by executing orders at the next bar's opening, accounting for execution delays. You've also explored parameter optimization with cerebro.optstrategy and assessed strategy performance using metrics such as the Sharpe Ratio. These core principles lay a solid foundation for building and refining trading systems. To deepen that foundation, our list of the best algorithmic trading books covers the theory behind these systems.
Next Steps for Advanced Development
With the basics under your belt, you can now focus on expanding and improving your trading system. Start by creating custom indicators using lines and params attributes to generate proprietary signals. For more dynamic position sizing, consider implementing custom Sizers that adjust based on account equity or market volatility rather than fixed amounts. To avoid overfitting, experiment with walk-forward optimization and validate optimized parameters on out-of-sample data before committing real capital.
Another step forward is incorporating multiple data feeds to trade across various asset classes or timeframes. For instance, you could use a daily chart to identify trends and a 5-minute chart for precise entries. Additionally, building stock screeners to filter large universes based on technical or fundamental criteria can enhance your strategy. When dealing with complex conditions during initialization, leverage Backtrader's utilities like bt., bt.Or, and bt.If, as standard Python operators may not work as expected with Lines objects. Finally, ensure your trading system accounts for real-world costs by setting commissions with cerebro.broker.setcommission, as net profits often differ significantly from gross profits.
FAQs
How do I prevent lookahead bias in Backtrader backtests?
To steer clear of lookahead bias in Backtrader, it's crucial to ensure your strategy relies solely on data that would have been available at the time of making each decision. Here's how you can do that:
- Use Historical Data Feeds Correctly: Make sure the historical data reflects the way it would appear in real-time, ensuring no future information sneaks into your analysis.
-
Access Only the Current Bar's Data: Stick to referencing the current bar (
[0]) when building your strategy. Avoid using future bars like[1]or[2], as this introduces data that wouldn't have been available during live trading. - Use the Data Replay Feature: Backtrader's replay feature allows you to simulate how data forms in real-time. This is a great way to test your strategy under conditions that mimic live trading.
- Validate Your Code for Data Leaks: Double-check your implementation to ensure no future data unintentionally influences your strategy.
By following these practices, you can maintain the integrity of your strategy and ensure it performs as expected in real-world scenarios.
What’s the best way to handle timezones and DST in my data?
Managing timezones and daylight saving time (DST) in Backtrader is straightforward when you use its built-in tools. Backtrader provides a trading calendar and timezone-aware datetime features to make adjustments. To handle DST shifts, you can specify timezones in your timers and session times. For datetime objects, libraries like pytz come in handy for adding timezone awareness. Additionally, custom trading calendars - such as those created with pandas_market_calendars - are a great way to ensure your trading aligns with DST changes and local market hours accurately.
How can I model slippage and realistic fills in Backtrader?
To simulate slippage and realistic fills in Backtrader, take advantage of the built-in broker's slippage settings. You can adjust parameters like slip_perc (a percentage-based slippage), slip_fixed (a fixed amount of slippage), and use options such as slip_open or slip_limit to fine-tune how slippage is applied during trades.
If you need more precise control, you can go a step further by overriding the _getcommission method in a custom broker subclass. This allows you to replicate more nuanced real-world fill scenarios during your backtesting process.
How do I use bracket orders for stop-loss and take-profit in Backtrader?
Use buy_bracket to submit an entry with linked stop-loss and take-profit orders. For example, self.buy_bracket(price=13.50, limitprice=14.00, stopprice=13.00) creates an entry at $13.50, a target at $14.00 and a stop at $13.00. The child orders activate after the entry executes; executing or canceling one active child cancels the other.


